5 min read
Publishing & SchedulingSchedule a post
Scheduling lets you prepare content in advance, verify timing, and keep your queue full without posting manually every day.
Before you start
- Make sure the target channel is connected and active.
- Finish your caption and media in the composer.
- Decide whether you are scheduling a one-off post or filling a repeatable publishing cadence.
Schedule the post
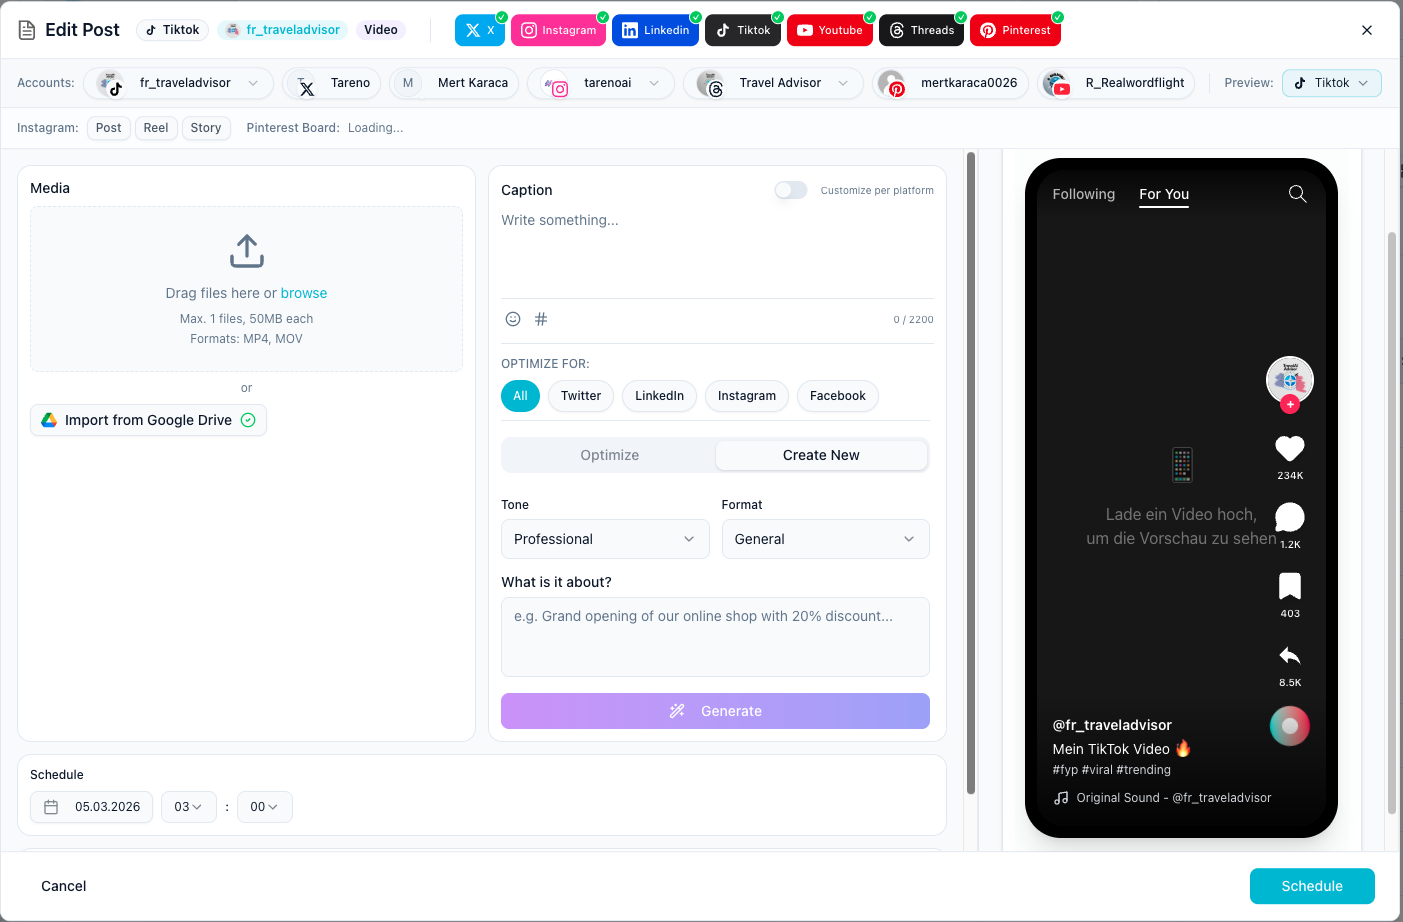
- Open the composer and complete the post content.
- Select the connected channel or channels.
- Choose Schedule instead of publishing immediately.
- Set the date and time you want the post to go live.
- Save the scheduled post and confirm it appears in the queue.
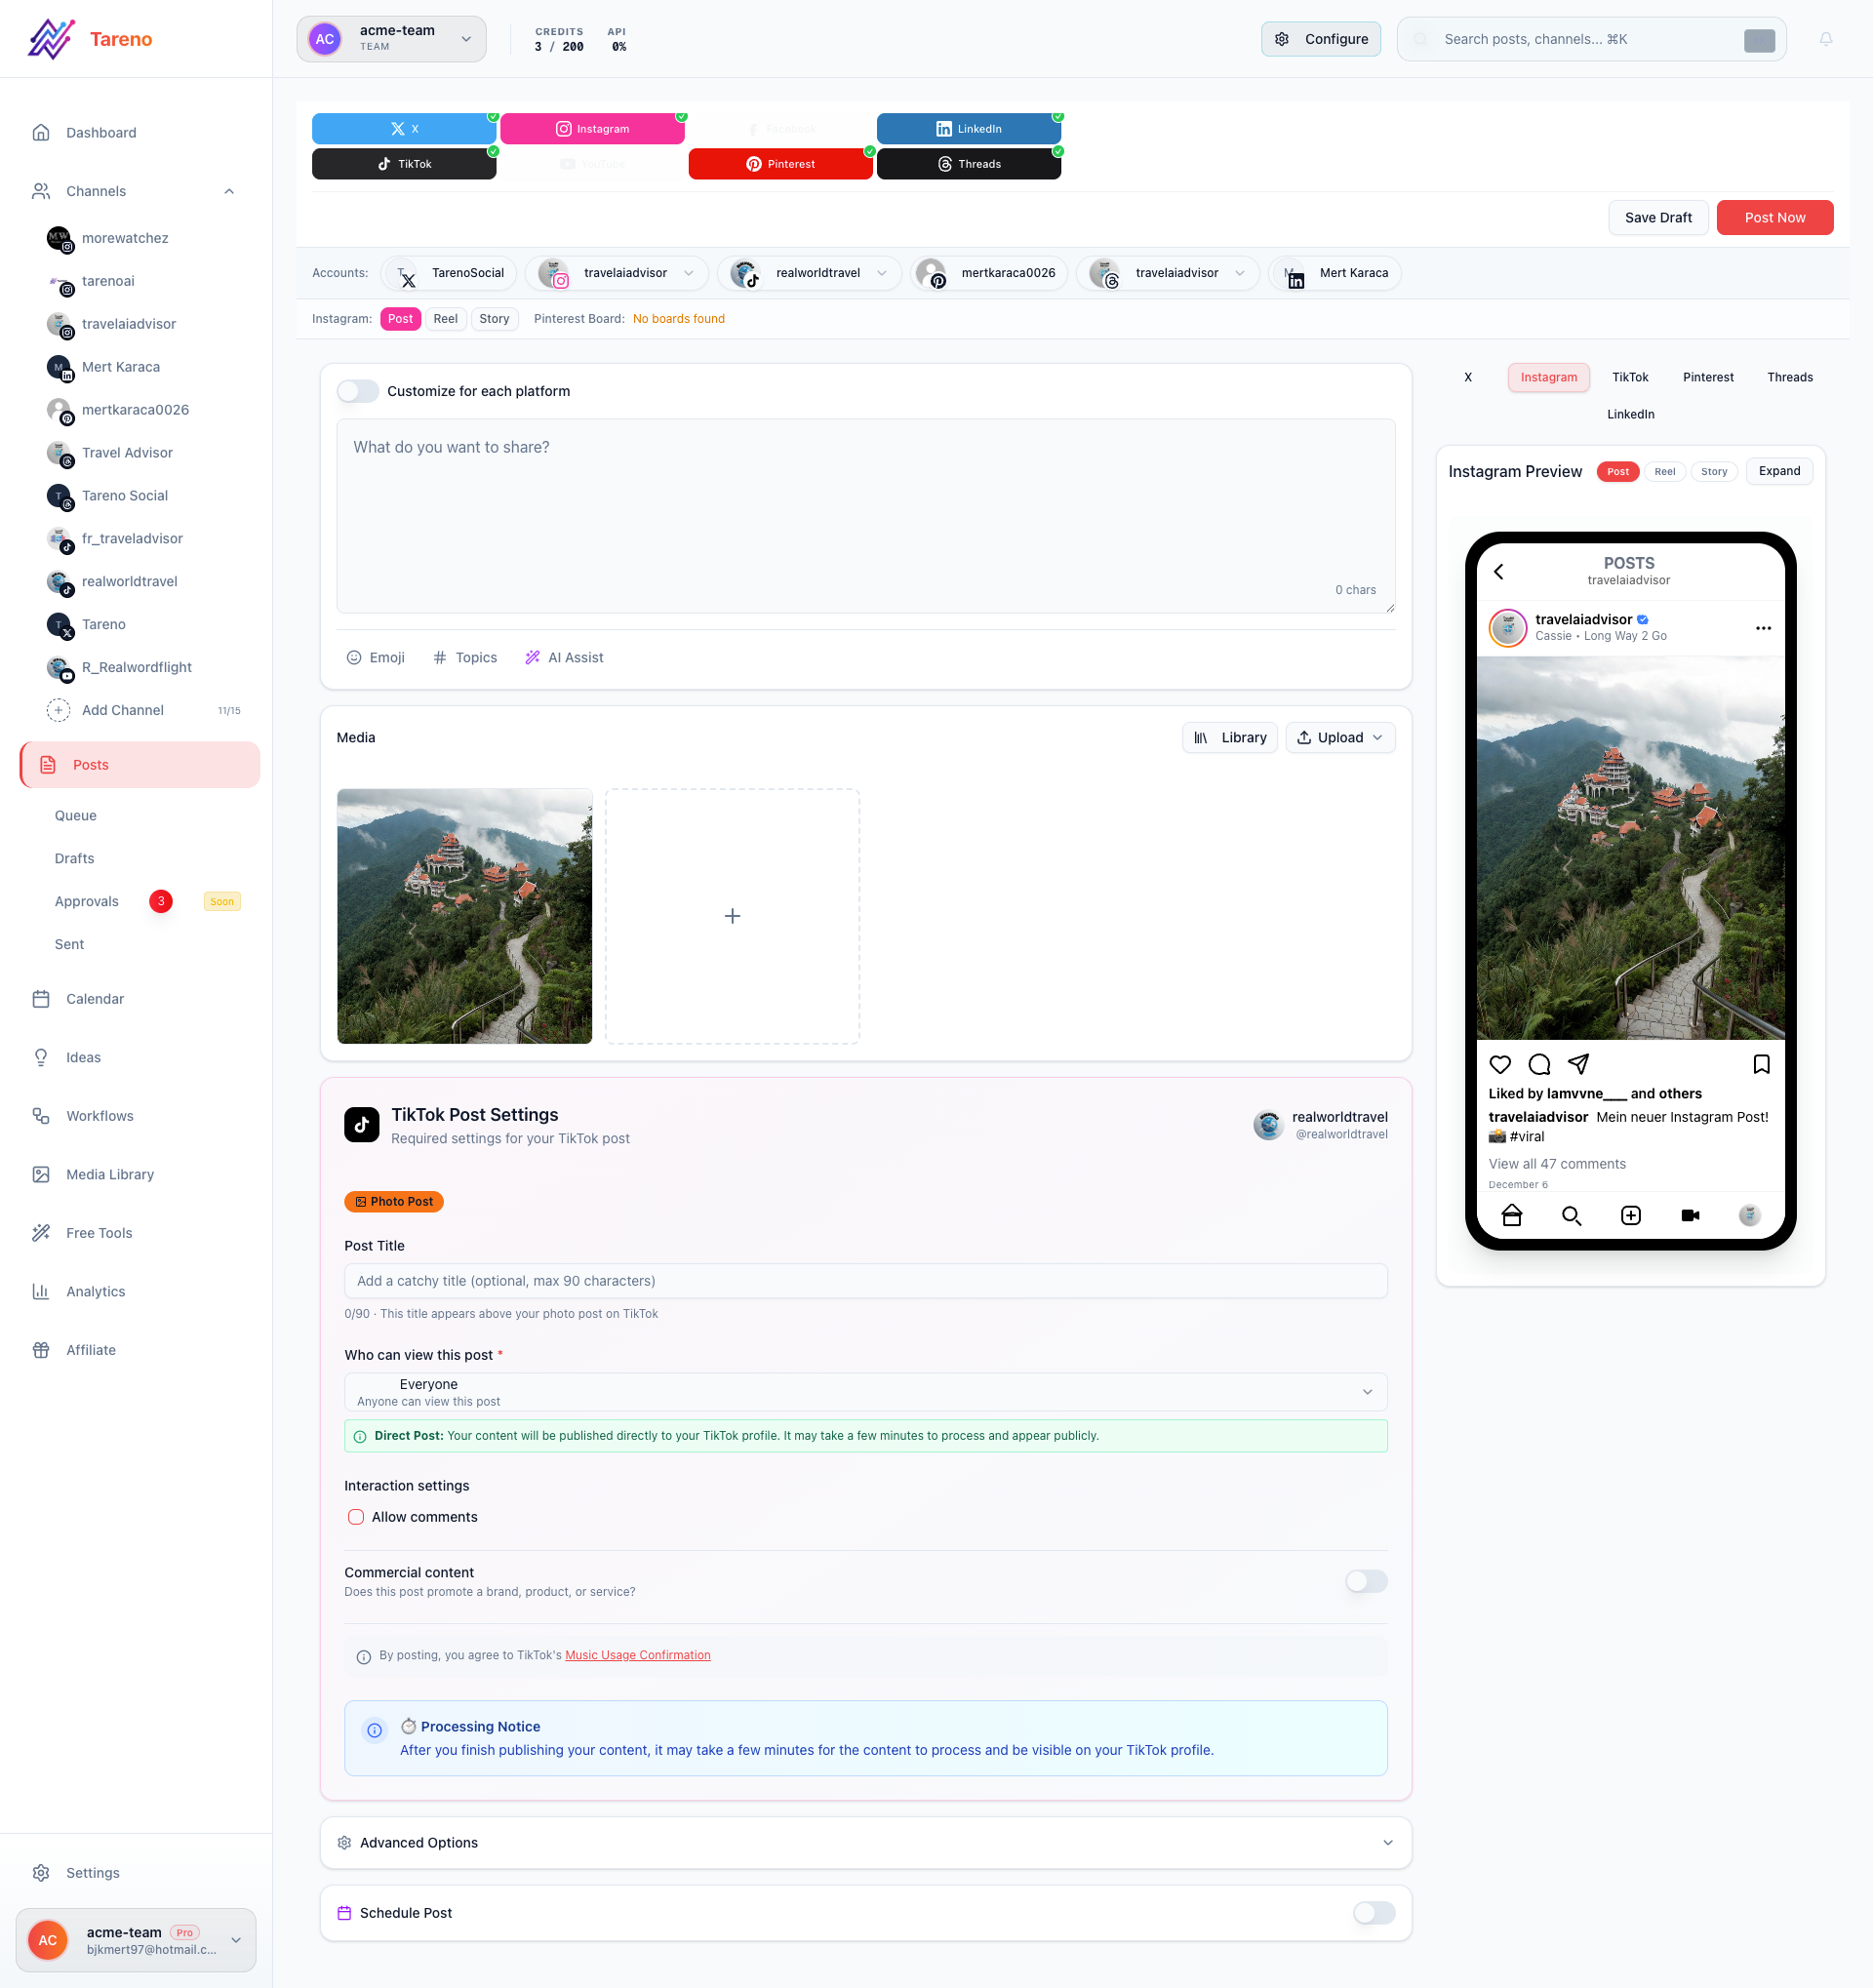
Review the final version before saving
Use the completed composer state to double-check channels, copy, and media.
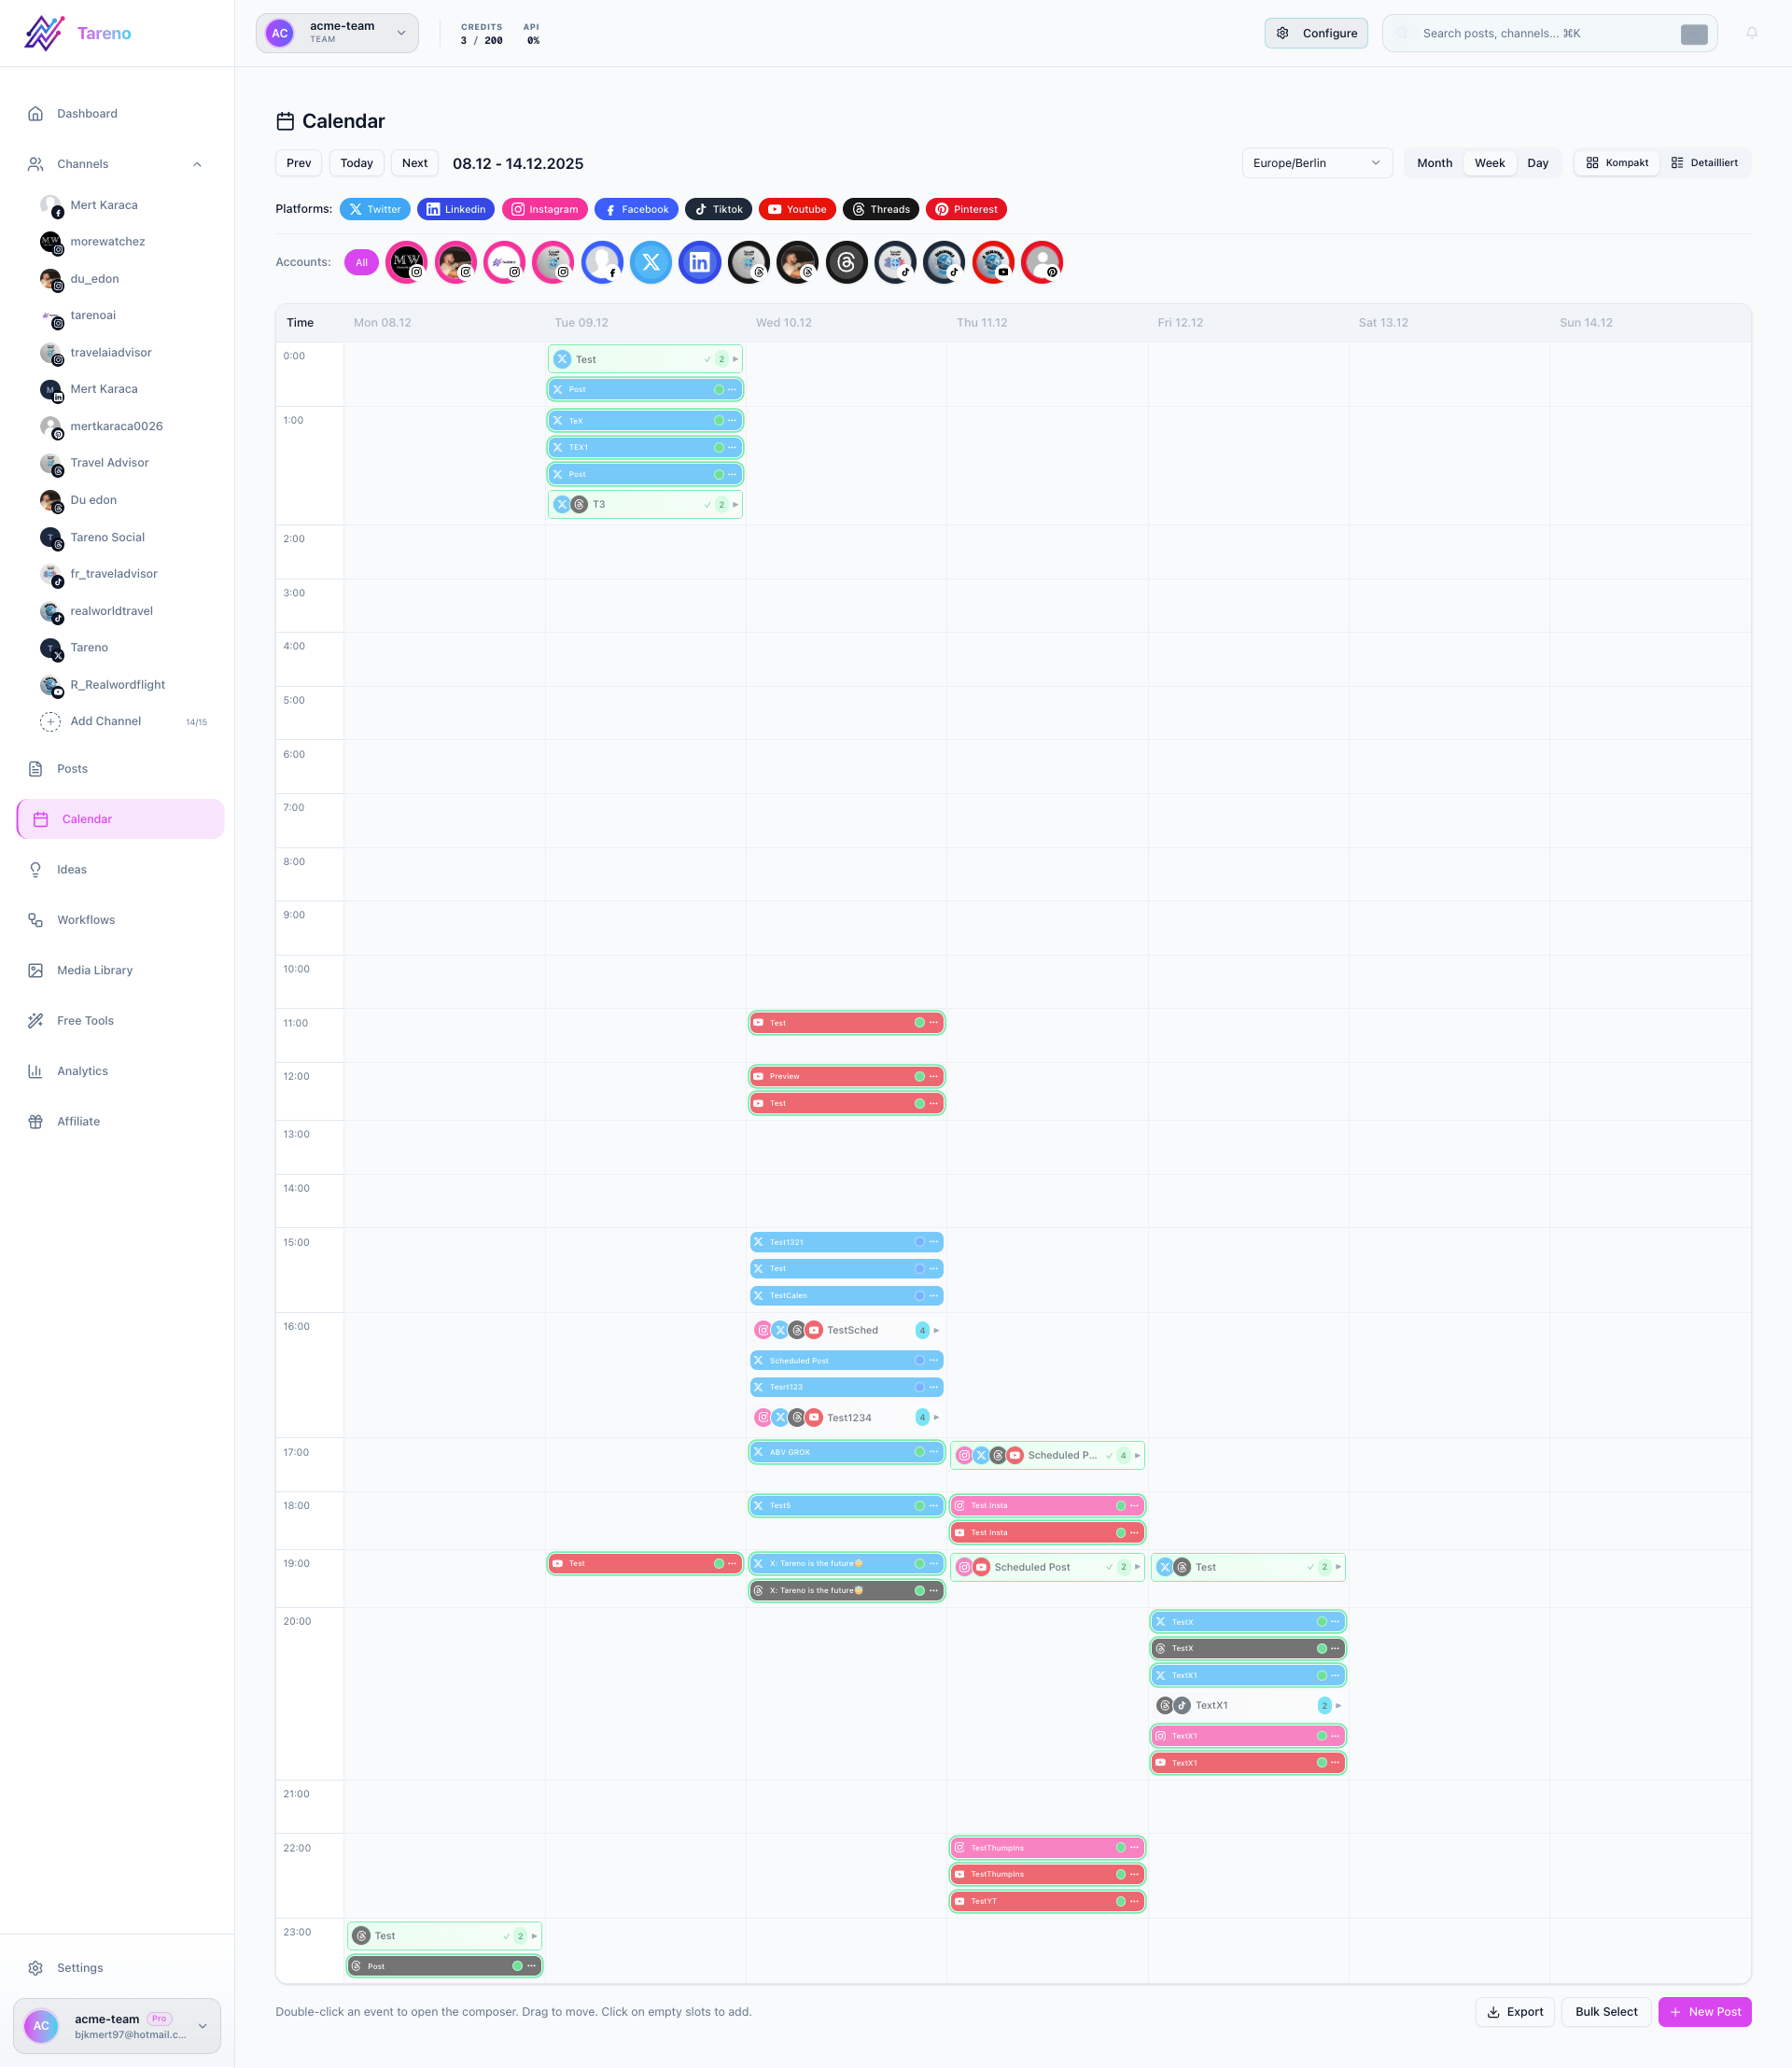
Verify it in your calendar
After saving, open the calendar to confirm the scheduled time and placement.
Confirm it in the queue
The queue gives you a second place to verify status, timing, and future publishing order.

Troubleshooting
- If the post does not appear in the queue, refresh the page and confirm the selected channel is connected.
- If the time looks wrong, recheck the workspace timezone before resaving.
- If a channel fails validation, update the media format or caption before trying again.
Related features and workflows
- Learn how Multi-Platform Publishing works across channels
- Set up Approval Workflows so posts get reviewed before they go live
- Use the Visual Content Calendar for timeline planning
- Explore automated Content Repurposing to multiply your reach
Free tools for better timing
- Best Time to Post — data-driven timing recommendations
- YouTube Title Generator — craft better titles for scheduled videos
What to do next
Use Best time to post when you want stronger timing guidance before filling the queue.
Was this article helpful?
Your feedback helps us improve our documentation.
Last Updated
March 8, 2026