Workflow Builder
The Workflow Builder turns repeated social media work into a system that runs on its own. A workflow starts with a trigger, takes its material from a content source, does something in an action, and can wait, ask for approval or follow a publish schedule on the way.
What you can automate
- Every Monday, let AI write posts in several languages from your own photos and videos, review them, and publish them on fixed days.
- Post the next image from a media folder three times a week with a fixed caption.
- When a new TikTok goes live, repost it to YouTube Shorts 30 minutes later.
- Keep evergreen posts from your repost queue in rotation.
- When a post crosses a like or view threshold, share it to another channel.
The workflow overview
Open Dashboard → Workflows to see every workflow. Switch the view in the top right:
- Cards: one card per workflow with its steps, status, next run and how long its content lasts.
- List: one compact row per workflow with schedule, next run, content reach and quick actions.
- Planning: the coming 14 days of every scheduled workflow, day by day, with the media each run will use and when the posts go live.
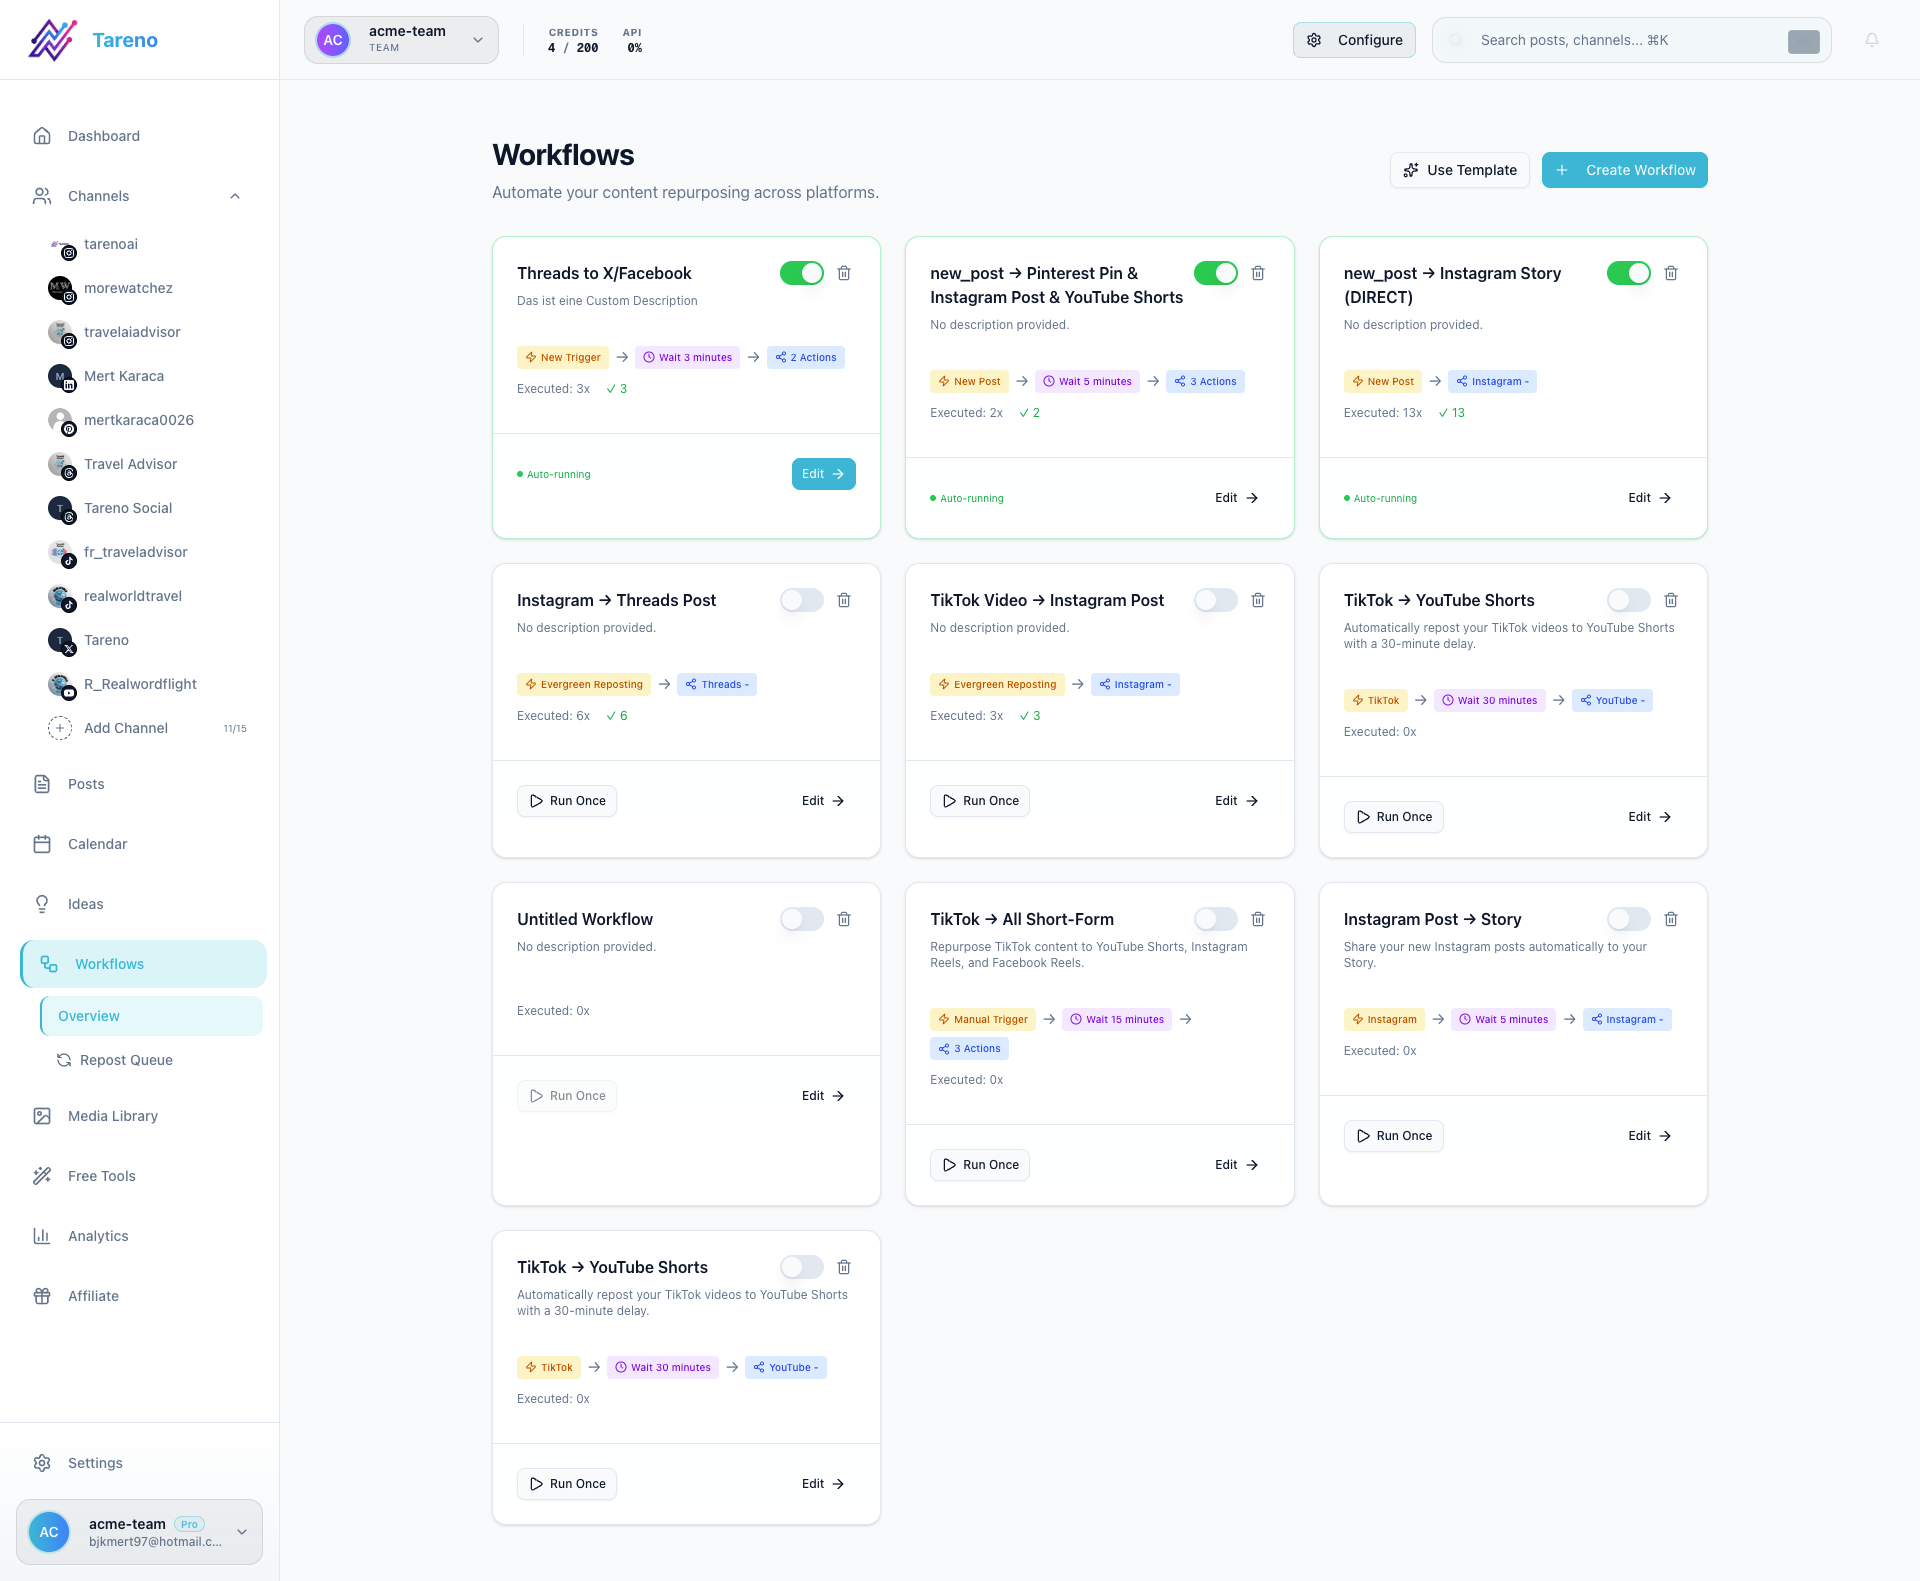
Each workflow can be switched on and off with its toggle. Run once starts an inactive workflow a single time for testing. It asks first, because it creates real posts or drafts and uses media from your folders.
Details: Planning, preview and monitoring.
The editor
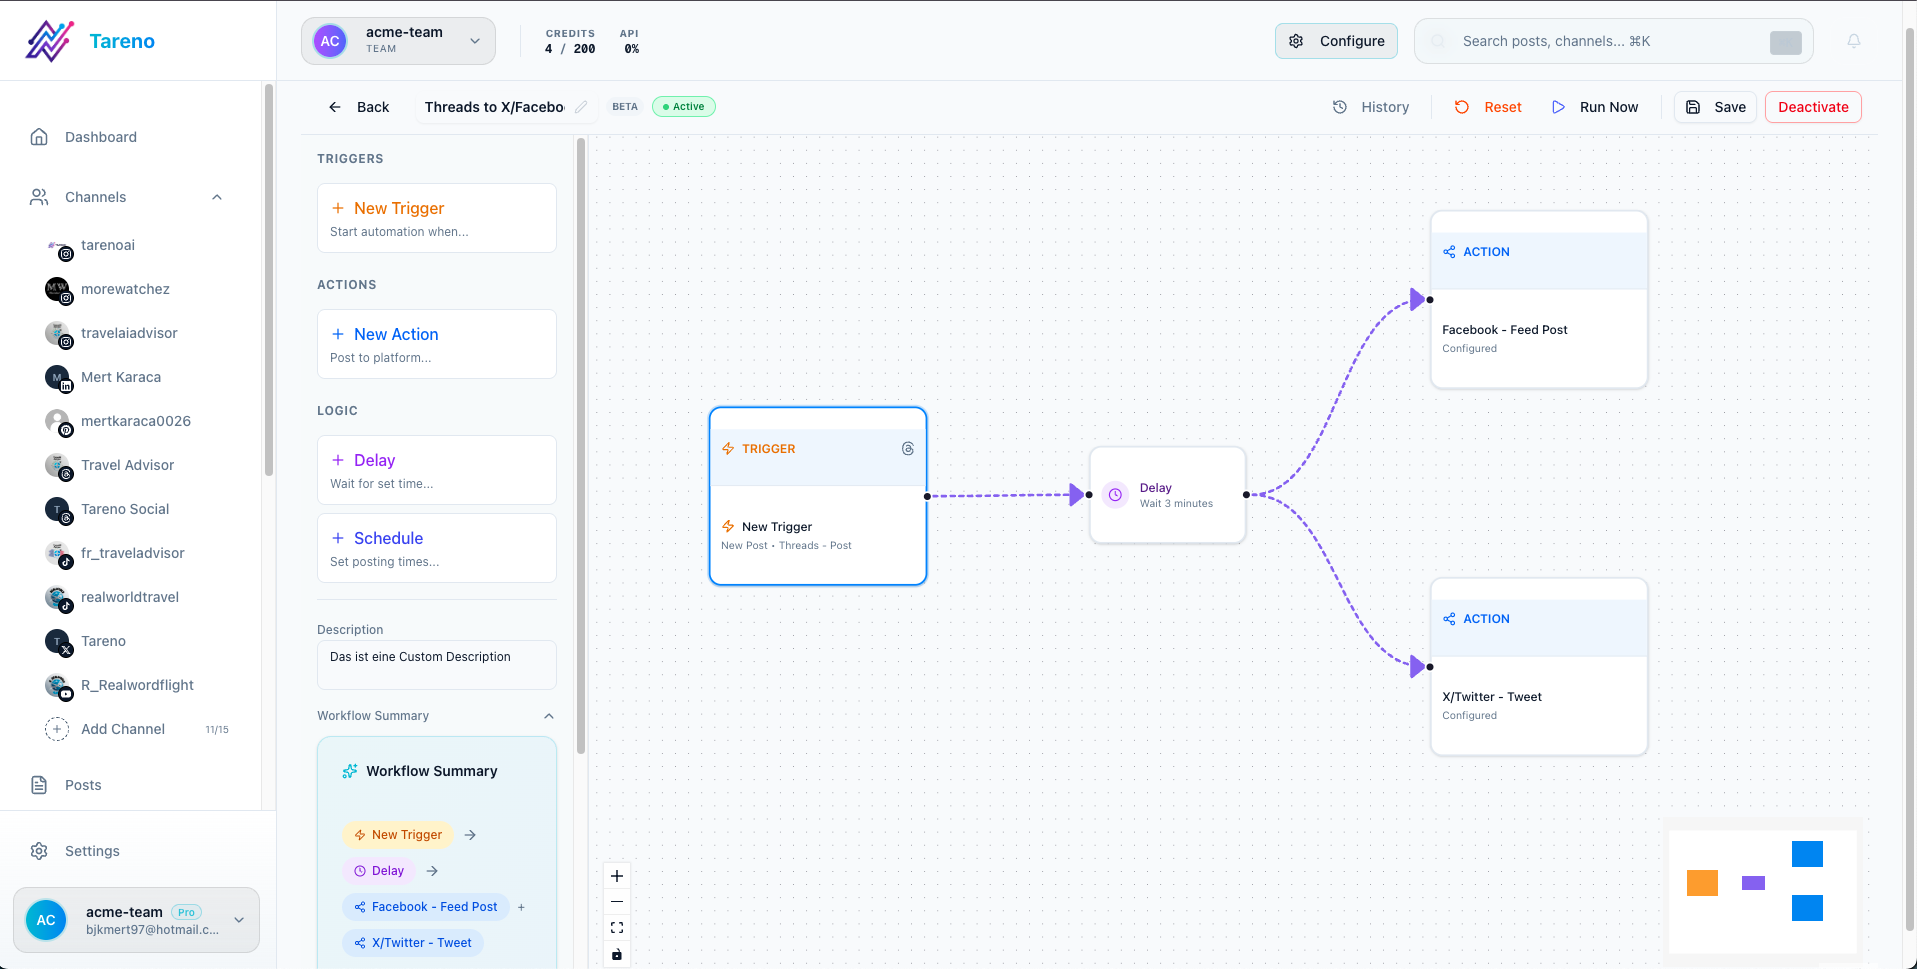
Open a workflow to build it on the canvas:
- Left: the steps you can drag onto the canvas, grouped into Trigger, Content, Actions and Logic.
- Middle: the canvas. Connect steps by dragging from the dot on the right of one step to the dot on the left of the next.
- Right: the settings of the selected step.
- Top: name, status, Preview, Run now, Save and Activate.
- Bottom left: zoom in, zoom out, lock the canvas, fit all steps into view and fullscreen.
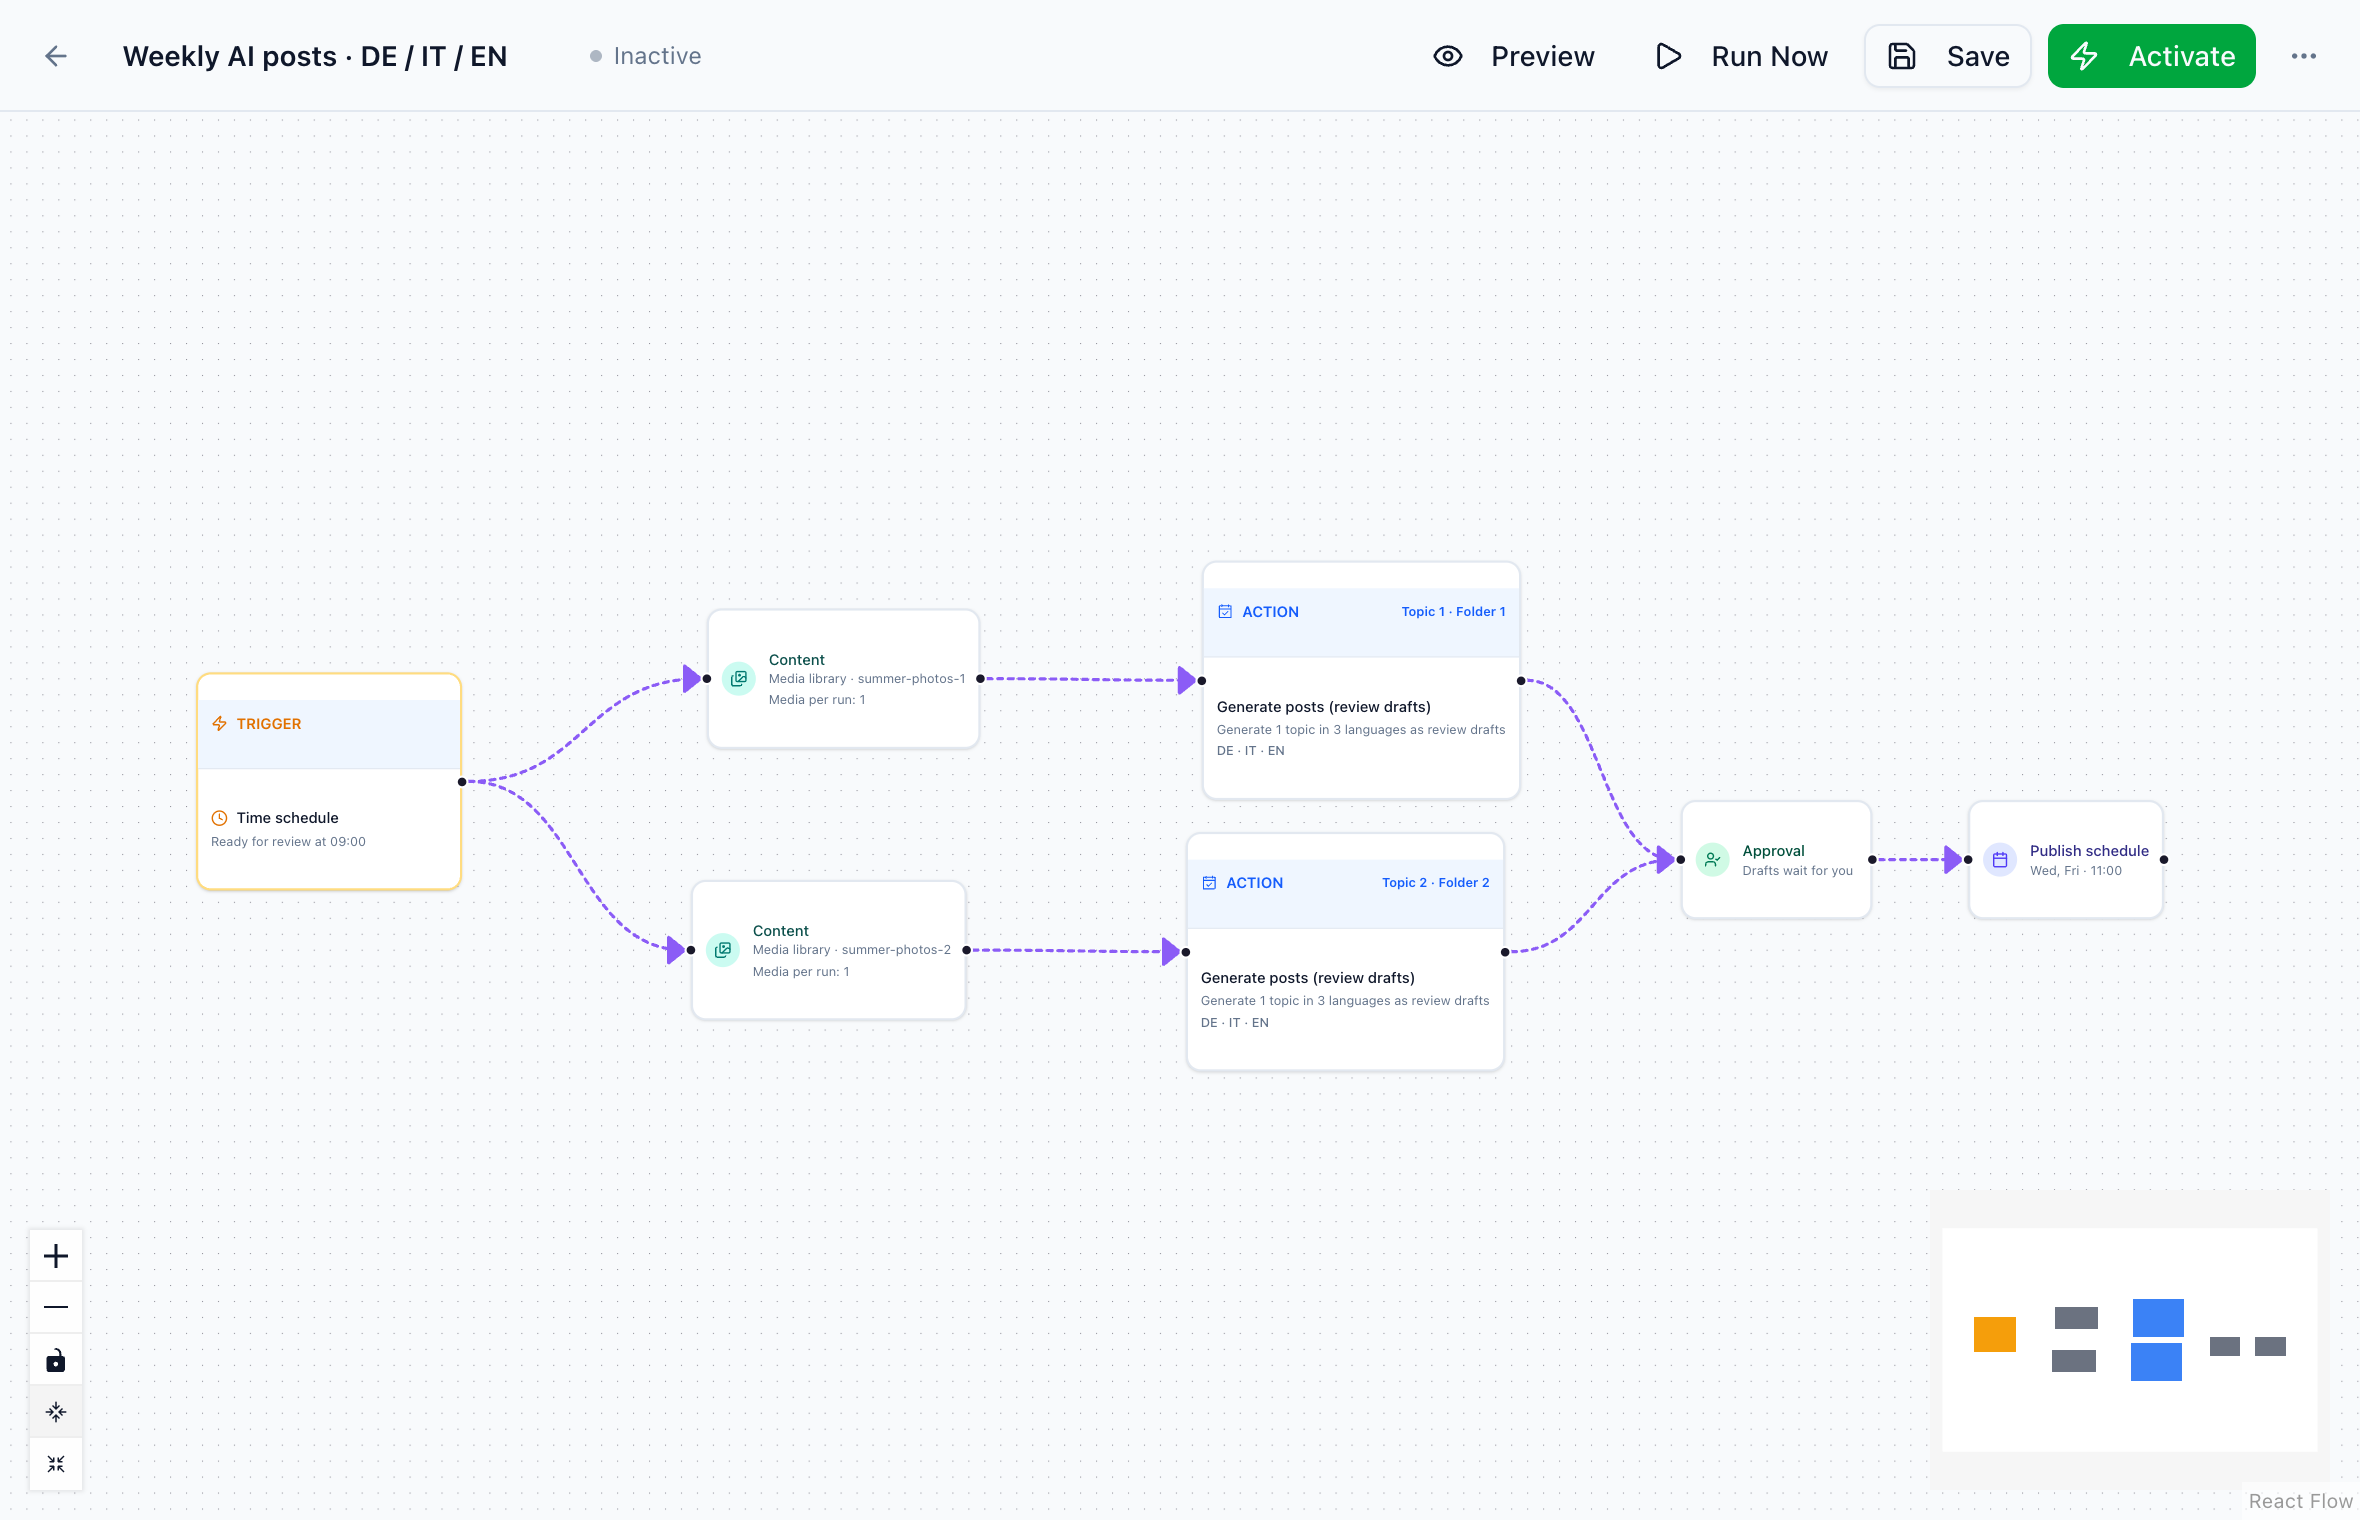
In fullscreen the canvas fills the whole screen, which helps with larger workflows. Press Esc or the same button to leave it.
Under the step list, the workflow summary describes the whole workflow in one sentence, for example Every Monday at 09:00, 2 topics in 3 languages as review drafts (from “own-media”), published after approval: Tue, Thu · 11:00. Read it before you activate a workflow.
The steps
| Step | Question it answers | Typical settings |
|---|---|---|
| Trigger | When does the workflow run? | Time schedule (days, time, timezone), new post, tracked metric, evergreen or manual |
| Content | Where does the material come from? | Media folder, repost queue or one published post; for AI posts also a briefing and topic ideas |
| Action | What happens? | Publish, create posts with AI or create a video |
| Delay | Should it wait first? | Minutes, hours or days |
| Publish schedule | When do the posts go live? | Publish days, times, timezone |
| Approval | Who checks it first? | Nothing to set; posts wait as drafts |
| If condition | Only continue when …? | A metric of the post, for example likes over 100 |
A workflow has exactly one trigger, one content step, one publish schedule and one approval step. Connections that would form a loop are refused, because a workflow runs once from the trigger to the last step.
Every step is explained in Workflow steps: settings for every step.
Triggers
- Time schedule: runs on the weekdays you choose, for example Monday, Thursday and Friday, at a set time in your timezone. Use Every day or Mon–Fri as shortcuts. Daylight saving time is handled for you. Workflows that create posts with AI can prepare drafts before delivery: you set when the drafts should be ready for review, and creation starts an hour earlier.
- New post: runs when a new post goes live on a connected account. The post itself is the material, so a content step is not used.
- Tracked post metric: runs when the latest tracked post crosses a threshold, for example 1,000 views.
- Evergreen reposting: keeps existing content in rotation with its own posting cadence.
- Manual: runs only when you click Run now.
What gets posted is never set in the trigger. That is the job of the Content step.
Build a workflow step by step
- Open Dashboard → Workflows, then Use template or Create workflow.
- Add and configure the Trigger.
- Add a Content step, unless the trigger brings its own post. You can also add it from the trigger's settings with Add content step.
- Add the Action and choose what should happen.
- Optional: add a Delay, an Approval and a Publish schedule.
- Open Preview to see what the next runs would do, with dates, media and whether posts land as drafts or go out directly.
- Save, then Activate.
Examples
Weekly AI posts with approval
Trigger Monday, ready for review at 09:00 → Content folder “own-media” → Action Create posts → Approval → Publish schedule Tue, Thu 11:00. With two content steps and two actions, each folder gets its own topic per run, as in the fullscreen example above. See Weekly content plan with AI review drafts.
A media folder as a posting queue
Trigger Mon, Wed, Fri 10:00 → Content folder “summer-2027”, oldest first, post text → Action Instagram · Feed post. Each run posts the next image the workflow has not used yet. See Content step and media folders.
Repost a new TikTok to YouTube Shorts
Trigger New post, TikTok video → Delay 30 minutes → Action YouTube · Shorts.
Share winners
Trigger Tracked post metric, views over 1,000 → Action Instagram · Story.
Checks before you activate
- Every action has a connected target account.
- The action's format matches the media, for example Reels and YouTube Shorts need videos.
- The publish schedule has at least as many slots per week as the trigger creates posts; the step warns you otherwise.
- AI captions, AI posts and image analysis use AI credits.
- Create video needs your own API key for a video provider such as Higgsfield, Runway or OpenAI. Connect it under Settings → Integrations first.
Related guides
- Workflow steps: settings for every step
- Content step and media folders
- Approval and the review page
- Planning, preview and monitoring
- Weekly content plan with AI review drafts
- Automated Repost Queue
Was this article helpful?
Your feedback helps us improve our documentation.
Last Updated